making minecraft playermodels - 2025/02/15
this just in: local 2D artist tries 3D modelling
ok well...minecraft playermodels are a little more basic than other forms of 3D modelling; you can even work from the original playermodel as a starting point (which i did).
in this regard, though, i think it might be a good simple starting point before getting into more advanced 3D modelling. i'm making this post largely to have an excuse to use the blog section again, and also largely to show off the models that i made of auro and nebula.
that being said... here they are!
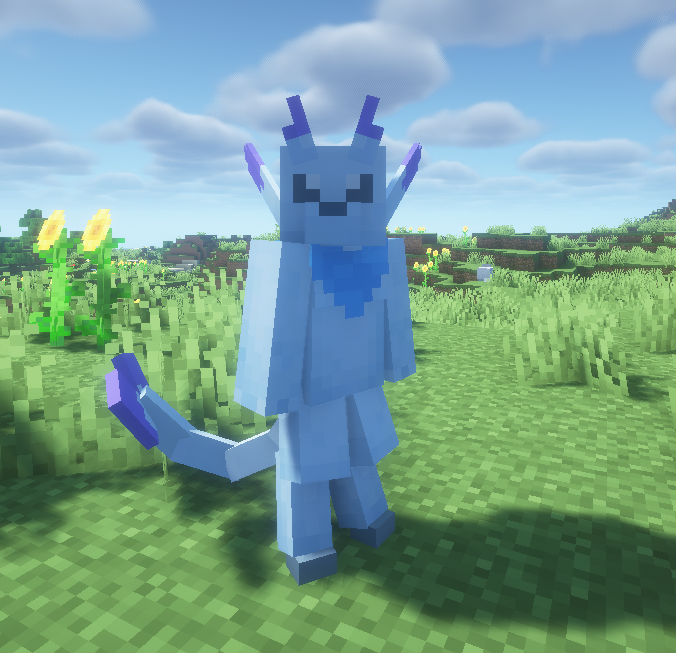

overall, i really like how they came out! who knows, maybe it'll get me to play more minecraft at some point...
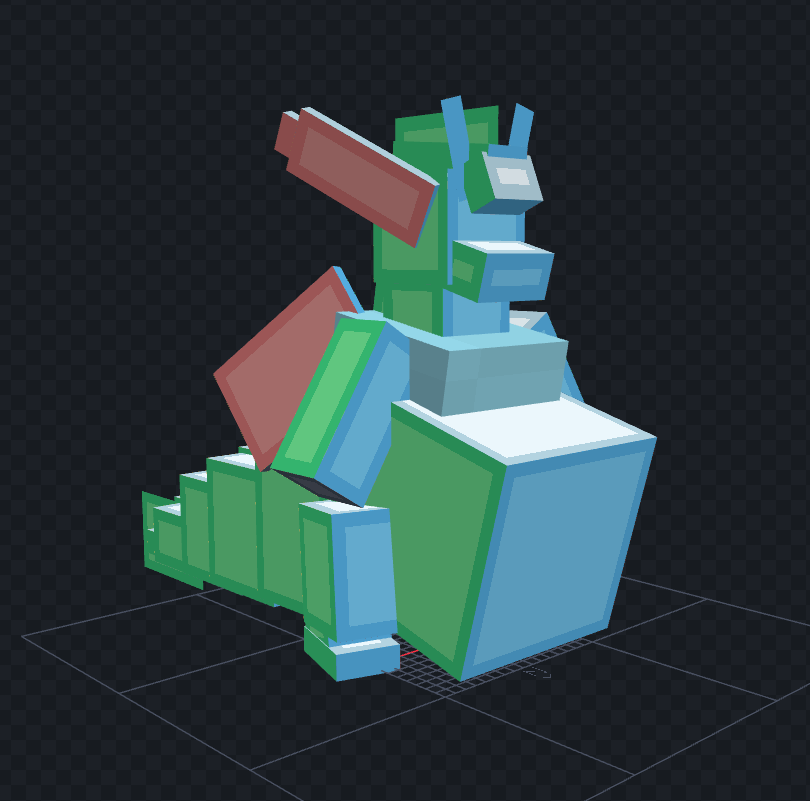
i'm particularly proud of nebula's model. i think nebula's design just felt a bit more interesting to try and translate into a minecraft model while keeping their pear shape. i think i did a good job!
the process
this won't really be a step-by-step guide. there are probably plenty of good tutorials both for blockbench (which i used to make the models), and for the customizable player models mod (which i used to put them in the game). said tutorials can probably explain the process better than i could. nonetheless, i wanted to show a few silly things that i came across along the way.
first, though, i should note that this wasn't my first time trying this. i had a little prior experience with an earlier auro model i made.
i felt that there were things i could improve upon with this model. the way i modelled a few things felt awkward, notably the legs and the scarf. in the final model, i was able to refine those areas. for example, i used minecraft's extra body texture layer for auro's scarf instead of modelling it.
additionally, after finishing my models, i was able to use the customizable player models (CPM) mod's built-in features to add some final touches like a little bit of animation. maybe i'll add some GIFs here at some point showcasing it, but the biggest one is that auro and nebula's tails slowly sway back and forth, which is most noticeable when idle.
some work-in-progress screenshots
when making nebula's model, i was initially terrified at the prospect of UV mapping it. nebula's model has a lot more surface area than auro's, but the regular minecraft player texture is only 64x64 pixels. auro's texture fits nicely into this, but i feared nebula's wouldn't. i also put off UV mapping until after the modelling was done. by the time i had gotten a decent way through, the UVs looked like this.

this was going to be messy to fix. but then i noticed you could create a new template texture at a different size, so i was curious.
wow! look at that! they're a lot better now. the template was also larger, being 256x256 pixels. this gave me more room for textures without having to resort to some UV mapping wizardry to get everything to fit.
then came texturing itself, which was fine until i got to the wings. this one is just a skill issue honestly. i find i still have trouble drawing nebula's wings sometimes. no matter what i tried i couldn't figure out how to make the wings not look square.
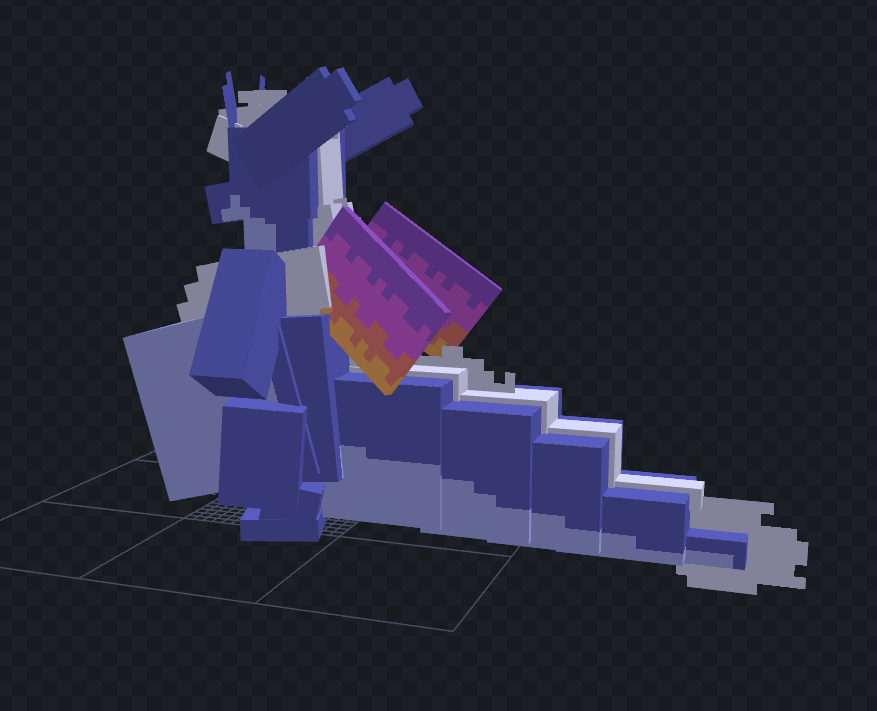
eventually i decided to just make them a texture on a flat plane, which looked good enough to me. maybe it's something i'll touch up in a future model, if i know a better solution by then.
some final thoughts
i thought making these models was surprisingly fun! i'm really happy with how they turned out, especially considering i don't have much experience with modelling.
there's somewhat of a learning curve, particularly with learning blockbench itself, but i think the actual process of modelling was relatively simple. starting from the regular minecraft player model gives a nice template compared to doing them from scratch, and it really is just resizing and rotating cubes until the shapes are about right.
i think my pre-existing art experience helped a lot, though, particularly with the texture work. both models each took me about a day or so.
still, i honestly would recommend giving minecraft playermodels a shot as a starting point for 3D modelling, if you're interested.
addendum (2026/06/26)
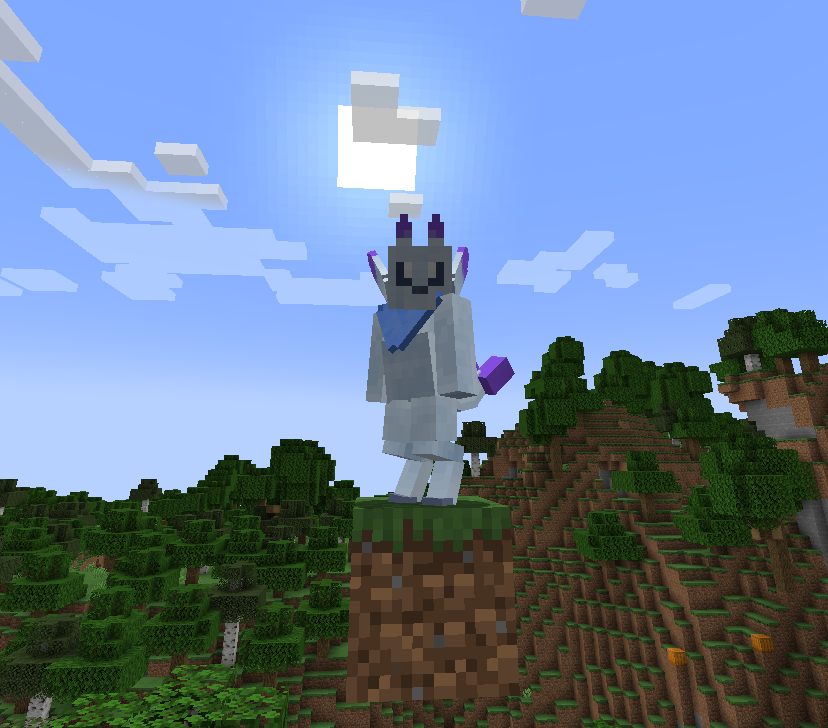
hey, so this wasn't actually the end! back in january or so (about a year after initially writing this post), i went and re-made the auro model!

this one i'm much happier with. i think it looks cuter than the old one, and it's a bit smaller than the original model, so it more closely matches auro's size (it's not exact, though).
(for reference, the older auro models were essentially the same height as the default minecraft player model. auro's proper height is around 81 centimeters. i want to say the new model is closer to 1.5 blocks tall? i haven't exactly measured it though.)
however, this creates a slightly different issue. auro's model is smaller than the regular one, but still behaves as though it were the size of the default player model in-game. eye level, player hitbox size, and everything are still the same as the default, so there's a bit of mismatch.
i don't mind that the model doesn't have any gameplay effects, so it doesn't bother me that much. i believe there are mods that let you change the actual player size and eye height they line up more closely with the model (i think pehkui is one example). maybe CPM itself also has a way to do so? i'm not terribly sure. that's something for me to figure out another time, i suppose.
for now, enjoy some in-game screenshots of the new auro model. thanks for reading!

